vinyl vloerbedekking
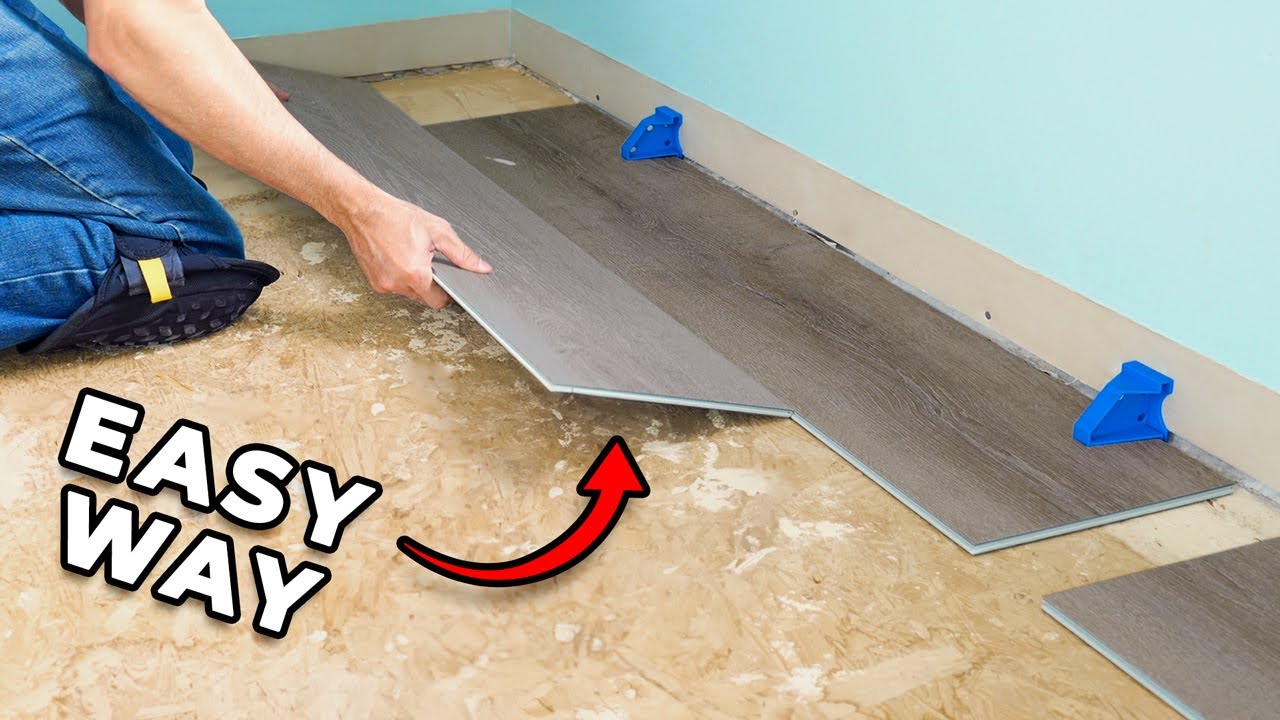
20 Tips for a Great Vinyl Plank Flooring Installation
Vinyl vloerbedekking is becoming increasingly popular due to its versatility, durability, and easy maintenance. Whether you are a DIY enthusiast or a professional contractor, a successful vinyl plank flooring installation requires careful planning and execution. In this article, we will provide you with 20 valuable tips that will help you achieve a great vinyl plank flooring installation.
Table of Contents
- Tip 1: Prepare Your Subfloor
- Tip 2: Acclimate the Vinyl Planks
- Tip 3: Measure and Plan Your Layout
- Tip 4: Start with a Straight Line
- Tip 5: Use a Quality Underlayment
- Tip 6: Choose the Right Adhesive
- Tip 7: Cut the Planks Properly
- Tip 8: Leave an Expansion Gap
- Tip 9: Lay the Planks in a Staggered Pattern
- Tip 10: Secure the Planks with Pressure
- Tip 11: Seamlessly Transition Between Rooms
- Tip 12: Use Transition Strips
- Tip 13: Pay Attention to Doorways
- Tip 14: Properly Trim Around Obstacles
- Tip 15: Install Baseboards or Quarter Rounds
- Tip 16: Clean and Maintain Your Vinyl Plank Flooring
- Tip 17: Avoid Direct Sunlight Exposure
- Tip 18: Protect Your Flooring from Furniture
- Tip 19: Address Subfloor Imperfections
- Tip 20: Follow the Manufacturer’s Instructions
Tip 1: Prepare Your Subfloor
Before installing vinyl plank flooring, it is crucial to ensure that your subfloor is clean, dry, and level. Remove any existing flooring, debris, and adhesive residue. Repair any cracks or uneven areas to create a smooth surface for installation.
Tip 2: Acclimate the Vinyl Planks
Vinyl planks need to acclimate to the room’s temperature and humidity for at least 48 hours before installation. This will prevent expansion or contraction issues after installation. Keep the planks in their packaging and lay them flat in the room where they will be installed.
Tip 3: Measure and Plan Your Layout
Take accurate measurements of the room and plan the layout of your vinyl plank flooring. Consider the direction of natural light, traffic patterns, and the size of the planks. This will help you determine the number of planks needed and ensure a visually pleasing result.
Tip 4: Start with a Straight Line
Establish a straight reference line to ensure a neat and aligned installation. Use a chalk line or laser level to mark a straight line across the room. This will guide you in placing the first row of vinyl planks.
Tip 5: Use a Quality Underlayment
An underlayment provides insulation, cushioning, and noise reduction. Choose a high-quality underlayment suitable for vinyl plank flooring. It will help smooth out minor imperfections in the subfloor and enhance the overall performance of your vinyl flooring.
Tip 6: Choose the Right Adhesive
Depending on the type of vinyl plank flooring you have chosen, you may need adhesive to secure the planks. Follow the manufacturer’s recommendations and select the appropriate adhesive for your specific flooring. Apply it evenly and in the correct amount to ensure a strong bond.
Tip 7: Cut the Planks Properly
Accurate and precise cuts are essential for a professional-looking vinyl plank flooring installation. Use a sharp utility knife or vinyl cutter to cut the planks to the required size. Measure twice before cutting to avoid mistakes and wastage of material.
Tip 8: Leave an Expansion Gap
Allow for expansion and contraction of the vinyl planks by leaving a small gap around the perimeter of the room. This gap should be approximately 1/4 inch to accommodate any temperature or moisture changes. Cover the gap with baseboards or quarter rounds for a finished look.
Tip 9: Lay the Planks in a Staggered Pattern
To achieve a natural and seamless look, lay the vinyl planks in a staggered pattern. This means starting each new row with a partial plank to create an offset effect. It will prevent the formation of noticeable seams and enhance the overall aesthetics of your flooring.
Tip 10: Secure the Planks with Pressure
After placing each vinyl plank, apply pressure to ensure a secure bond with the adhesive or interlocking mechanism. Use a flooring roller or a clean towel wrapped around a block of wood to press down on the plank. This will eliminate any air bubbles and ensure a flat installation.
Tip 11: Seamlessly Transition Between Rooms
If you are installing vinyl plank flooring in multiple rooms, pay attention to the transitions between them. Use transition strips or T-molding to create a smooth and visually appealing transition. It will provide a finished look and prevent tripping hazards.
Tip 12: Use Transition Strips
When transitioning from vinyl plank flooring to other flooring types, such as carpet or tile, use transition strips. These strips will bridge the height difference between the two surfaces and protect the edges of the vinyl planks. Choose a transition strip that matches the color and style of your flooring.
Tip 13: Pay Attention to Doorways
Doorways present a challenge when installing vinyl plank flooring. To achieve a professional look, undercut the door jambs and trim to allow the planks to fit underneath. This will create a seamless transition and prevent unsightly gaps or bulges.
Tip 14: Properly Trim Around Obstacles
When encountering obstacles such as pipes or cabinets, cut the vinyl planks to fit around them neatly. Measure carefully and use a jigsaw or hole saw to make precise cuts. Take your time to ensure a clean and professional finish around these obstacles.
Tip 15: Install Baseboards or Quarter Rounds
To complete the look of your vinyl plank flooring, install baseboards or quarter rounds along the perimeter of the room. This will cover the expansion gap and provide a finished appearance. Choose a style that complements your flooring and the overall aesthetic of the space.
Tip 16: Clean and Maintain Your Vinyl Plank Flooring
Vinyl plank flooring is known for its easy maintenance. Regularly sweep or vacuum the floor to remove dirt and debris. Use a damp mop with a mild vinyl floor cleaner for deeper cleaning. Avoid using harsh chemicals or abrasive tools that can damage the surface of the planks.
Tip 17: Avoid Direct Sunlight Exposure
Excessive exposure to direct sunlight can cause vinyl plank flooring to fade or discolor over time. Protect your flooring by using blinds or curtains to block out the sun’s rays during peak hours. Consider using window film or UV-resistant coatings to further protect your floor.
Tip 18: Protect Your Flooring from Furniture
Place felt pads or furniture glides under the legs of heavy furniture to prevent scratches and indentations on your vinyl plank flooring. Avoid dragging furniture across the floor, as it can leave permanent marks. Lift and carry furniture when moving it to avoid damaging the planks.
Tip 19: Address Subfloor Imperfections
If your subfloor has significant imperfections, such as large cracks or unevenness, consider addressing them before installing vinyl plank flooring. Fill cracks with a suitable filler, level uneven areas with a self-leveling compound, and sand down high spots. This will ensure a smooth and stable base for your flooring.
Tip 20: Follow the Manufacturer’s Instructions
Each vinyl plank flooring product may have specific installation instructions provided by the manufacturer. It is essential to carefully read and follow these instructions to ensure a successful installation. This will also help you maintain the warranty of your flooring.
Questions and Answers
Q: Can vinyl plank flooring be installed over existing flooring?
A: In most cases, vinyl plank flooring can be installed over existing flooring, such as hardwood, laminate, or tile. However, it is crucial to ensure that the existing flooring is in good condition, clean, and level. Follow the manufacturer’s recommendations and prepare the subfloor accordingly.
Q: How long does vinyl plank flooring typically last?
A: Vinyl plank flooring is known for its durability and can last for 10 to 20 years or more with proper care and maintenance. The lifespan may vary depending on factors such as the quality of the product, level of foot traffic, and maintenance routine.
Q: Can vinyl plank flooring get wet?
A: Vinyl plank flooring is water-resistant, but not completely waterproof. It can withstand spills and moisture to a certain extent. However, prolonged exposure to standing water or excessive moisture can damage the planks. Wipe up spills promptly and avoid wet mopping the floor.
Q: Can vinyl plank flooring be installed in bathrooms?
A: Yes, vinyl plank flooring is suitable for bathrooms due to its water-resistant properties. However, it is important to properly seal the edges and seams to prevent water from seeping underneath. Follow the manufacturer’s recommendations for bathroom installations and use silicone caulk to seal gaps.
Q: Is vinyl plank flooring suitable for radiant heating systems?
A: Yes, vinyl plank flooring can be used with radiant heating systems. However, it is important to choose a product that is specifically designed for use with underfloor heating. Follow the manufacturer’s instructions for installation and temperature limitations to avoid any potential damage.
Conclusion
Vinyl vloerbedekking provides an excellent flooring option for both residential and commercial spaces. By following the 20 tips mentioned above, you can ensure a successful vinyl plank flooring installation that will enhance the beauty and functionality of your space. Remember to prioritize proper subfloor preparation, acclimate the planks, and carefully plan the layout. With proper care and maintenance, your vinyl plank flooring will provide years of comfort and style.
20 Tips to help you install luxury vinyl plank flooring faster, better and easier! If you follow these vinyl flooring installation tips you’ll …