laminaat leggen
How to Install Laminate Flooring for Beginners: A Comprehensive Guide
Laminaat leggen, or laminate flooring installation, is a popular choice for homeowners due to its affordability, durability, and ease of installation. Whether you’re looking to upgrade your current flooring or embark on a DIY project, this comprehensive guide will provide you with the knowledge and expertise you need to successfully install laminate flooring in your home.
Table of Contents
- Introduction to Laminate Flooring
- Preparing for Installation
- Choosing the Right Laminate Flooring
- Tools and Materials
- Step-by-Step Installation Process
- Maintenance and Care
- Questions and Answers
- Conclusion
Introduction to Laminate Flooring
Laminate flooring is a versatile and budget-friendly option that replicates the look of hardwood, tile, or stone flooring. It consists of multiple layers, including a durable wear layer, a decorative layer, a core layer, and a stabilizing layer. This composition makes laminate flooring resistant to scratches, stains, and fading.
One of the main advantages of laminate flooring is its ease of installation. Unlike traditional hardwood flooring, laminate flooring can be installed without the need for nails or glue. Instead, it utilizes a click-and-lock system that allows the planks to fit together seamlessly.
Before you begin the installation process, it’s important to consider factors such as the type of subfloor, the room’s humidity levels, and the overall aesthetic you want to achieve. Proper preparation and careful selection of materials are key to a successful laminate flooring installation.
Preparing for Installation
Before you start installing laminate flooring, it’s essential to prepare the area properly. Follow these steps to ensure a smooth and successful installation:
- Clear the room: Remove all furniture, rugs, and other items from the room. This will give you ample space to work and prevent any damage to your belongings.
- Inspect the subfloor: Check the condition of the subfloor to ensure it is clean, dry, and level. Remove any existing flooring and repair any damages or unevenness.
- Acclimate the laminate flooring: Allow the laminate flooring to acclimate to the room’s temperature and humidity for at least 48 hours. This step is crucial to prevent any expansion or contraction of the planks after installation.
- Measure the room: Measure the width and length of the room to determine the amount of laminate flooring you’ll need. It’s recommended to purchase an additional 10% of flooring to account for any mistakes or future repairs.
Choosing the Right Laminate Flooring
When selecting laminate flooring for your project, consider the following factors:
- Thickness: Laminate flooring comes in various thicknesses, ranging from 6mm to 12mm. Thicker planks offer better durability and sound insulation.
- AC Rating: The AC rating indicates the durability and wear resistance of the laminate flooring. Choose a higher AC rating for high-traffic areas or commercial spaces.
- Design and Finish: Laminate flooring is available in a wide range of designs, including wood, tile, and stone. Select a design and finish that complements your existing décor.
- Underlayment: Consider using an underlayment, which provides additional cushioning, moisture resistance, and noise reduction.
Tools and Materials
Before starting the installation, gather the following tools and materials:
- Laminate flooring
- Underlayment (if desired)
- Tape measure
- Pencil
- Spacers
- Utility knife
- Saw
- Hammer
- Tapping block
- Pry bar
- Level
- Gloves and safety goggles
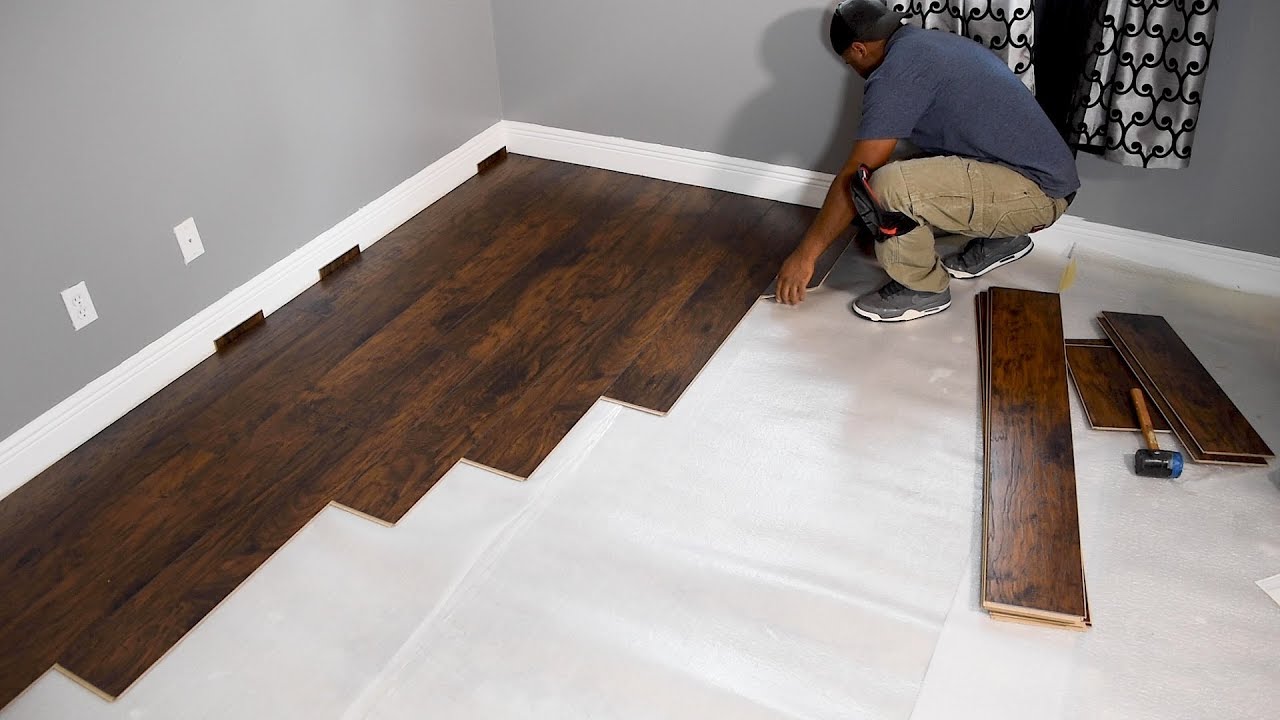
Step-by-Step Installation Process
Follow these step-by-step instructions to install laminate flooring:
- Start with the first row: Begin by laying the first row of laminate planks along the longest wall. Leave a 1/4-inch gap between the planks and the wall to allow for expansion.
- Continue with subsequent rows: Click the second row of planks into the first row, using spacers to maintain the expansion gap. Stagger the joints between planks for a more natural look.
- Cut planks as needed: Use a saw to cut the planks to fit around doorways, corners, and other obstacles. Remember to leave a 1/4-inch expansion gap around fixed objects.
- Install the last row: Measure and cut the last row of planks to fit the remaining space. Use a pry bar and tapping block to ensure a snug fit.
- Install baseboards and trim: Install baseboards or quarter round trim to cover the expansion gap around the perimeter of the room. Use a hammer and finishing nails to secure them in place.
- Inspect and clean: Once the installation is complete, inspect the flooring for any visible defects or gaps. Clean the surface with a laminate flooring cleaner to remove any debris.
Maintenance and Care
To keep your laminate flooring looking its best, follow these maintenance tips:
- Regularly sweep or vacuum the floor to remove dirt and debris.
- Use a damp mop or microfiber cloth to clean up spills immediately.
- Avoid excessive moisture and standing water, as it can damage the laminate flooring.
- Use furniture pads to prevent scratches and dents from heavy furniture.
- Avoid dragging heavy objects across the floor to prevent scratches.
Questions and Answers
Q: Can laminate flooring be installed over existing flooring?
A: In most cases, laminate flooring can be installed over existing flooring such as vinyl, linoleum, or hardwood. However, it’s important to ensure that the existing flooring is in good condition and properly prepared.
Q: How long does laminate flooring installation take?
A: The time required for laminate flooring installation depends on the size of the room and the complexity of the project. On average, it can take anywhere from a few hours to a couple of days to complete the installation.
Q: Can laminate flooring be installed in bathrooms or kitchens?
A: While laminate flooring is resistant to moisture, it is not recommended for areas with high humidity or direct water exposure, such as bathrooms or kitchens. In these areas, it’s best to choose waterproof flooring options.
Q: Can I install laminate flooring on stairs?
A: Yes, laminate flooring can be installed on stairs. However, special stair nose pieces are required to ensure a seamless transition and added safety.
Q: Is professional installation necessary for laminate flooring?
A: While laminate flooring can be installed as a DIY project, professional installation ensures a flawless finish and minimizes the risk of mistakes. If you’re unsure about your DIY skills, it’s best to hire a professional installer.
Conclusion
Laminaat leggen, or laminate flooring installation, is a cost-effective and visually appealing option for homeowners. By following the step-by-step instructions provided in this guide, you can successfully install laminate flooring in your home, transforming the look and feel of your space. Remember to choose the right laminate flooring, prepare the area properly, and maintain the flooring to ensure its longevity and beauty for years to come.
In this video, I am showing how to install laminate flooring for the first time. Check out http://becomeaframer.com/diycreators to …